A holster claw, also called a concealment claw or a claw kit, is another form of retention that you can install on your concealed carry holster. There’s many methods for gun holster retention these days, including ones like this where you can install it yourself. Most holsters will come equipped with some form of retention already.
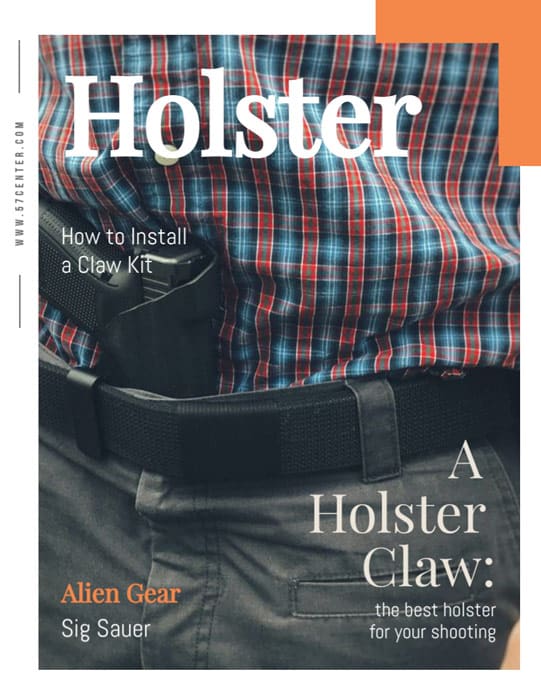
If you’re looking to install a claw attachment, there’s some things you should consider before you choose whether or not you need one. You should make sure that the holster claw won’t interfere or affect your personal shooting style or comfort. So, let’s talk a little bit more about what a holster claw is.
Contents
What is a Holster Claw?
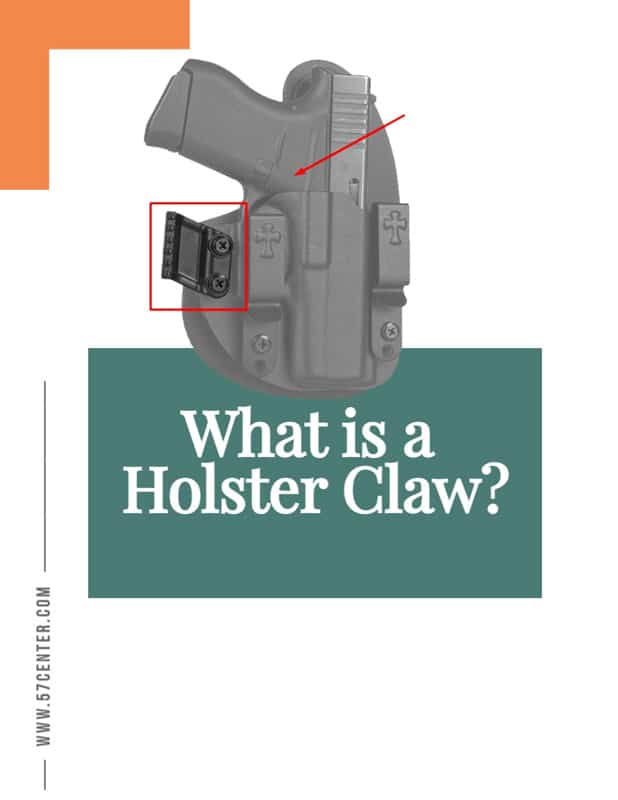
A claw attachment is a device that is usually attached to a AIWB holster. AIWB, or Appendix Inside the Waistband, is merely a position for the traditional IWB holsters. These are much different than an OWB holster and are considered a tuckable holster; you can use it to concealed carry inside your waistband. If you shoot with your right hand, the appendix carry holster will be placed at 2:30 o’clock instead of 12 o’clock on your waistband. If you shoot with your left hand, the IWB holster will be placed at 9:30 o’clock.
The claw attachment was created by a company called Raven Concealment and has since evolved to become a wide category of the holster market. Many brands now make their own versions of the claw holster that will fit any waistband holster and pistol. Raven Concealment Systems originally made the model for only one of their holster lines, but has since expanded to make other versions of the claw kit.
The concealment claw is basically another form of aftermarket retention that you can install on your holster. Instead of being geared towards just security and retention, this device will also reduce the print of your pistol for maximum concealability when you carry. This way, it will be much easier to conceal your holster regardless of the belt or the holster fit.
The claw kit works by pushing the pistol against your body, therefore bringing it away from the waistband and further into your body for better concealment. Usually, it’s just a piece of plastic that will be attached to the holster under the trigger guard. The claw uses the hardness of your gun belt to leverage the pressure against your body instead. It aligns with the belt clip to make sure that the holster is attached correctly. If the claw isn’t properly aligned with the holster clip, it won’t work right.
This claw changes the way that gun owners concealed carry. In previous years, often times the holster maker was responsible for creating a holster that promoted maximum concealability and was equipped with a standard claw; this claw attachment was often based on the size of the firearm. Now, with a claw kit, any gun owner with any body type can successfully conceal a large or small pistol easily.
How to Install a Holster Claw
Now, let’s talk about what you’ll need to install your concealment claw. We’ll only be listing some generic steps here to give you an idea of what the process will be like. Often times, there will be specific steps based on the brand of claw attachment and the holster you are attaching it to. So, don’t rely on just these steps. Make sure you check the product manual as well.
Claw Kit Components
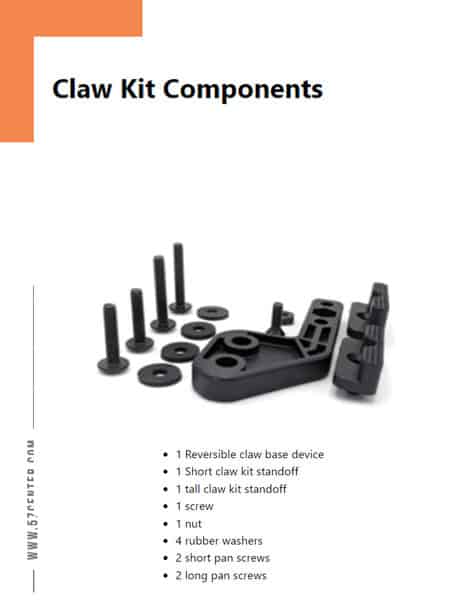
There’s a few parts that will come standard with any claw kit. For this example, we will go over the Concealment Express Holster Claw Kit. This kit comes equipped with:
Claw Kit Components
- 1 Reversible claw base device
- 1 Short claw kit standoff
- 1 tall claw kit standoff
- 1 screw
- 1 nut
- 4 rubber washers
- 2 short pan screws
- 2 long pan screws
Claw Kit Installation Instructions
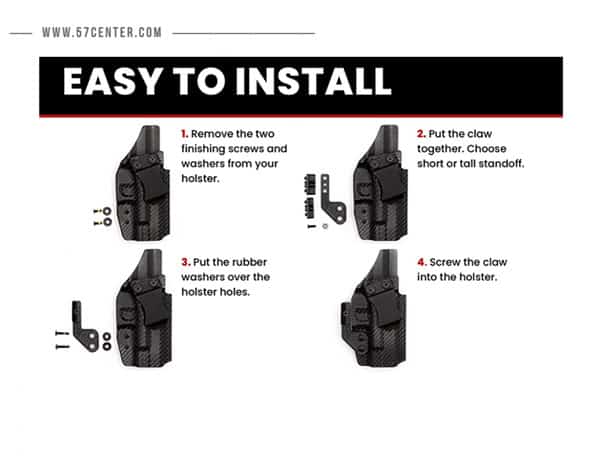
We’ll still be talking about the Concealment Express kit, just as an example. Most other claw kits will be mostly the same but maybe with a different screw or two. So, let’s go over these installation steps to give you a good idea of what the installation process will consist of.
1. Remove the Existing Retention
To start, you’ll have to remove whatever retention is already present on your waistband holster. Typically, there will be two mounting holes with screws and washers. Remove these screws and washers and set them to the side; you’ll need them later.
2. Align the Claw Kit
Now, take your new claw attachment and align it with the previous mounting holes. You’ll also have to choose and attach the type of standoff that you will want for your claw attachment.
3. Attach the Claw Kit
Now it’s time to attach the claw. Using the provided rubber spacers, place those onto your screws and screw them into the mounting holes. Just screw the claw in until it’s tight and you’re all set!
Another thing you’ll have to do is adjust the push. This is where the standoff will come in; some other claw kits might come with two different padding materials that will be used as well as two different mounting holes and locations. It all depends on your specific model.
The example we talked about was for a Kydex holster. I decided to use this one just because of its simplicity. This particular claw kit can be used for either a left handed IWB holster or a right handed IWB. That way, you’re walking away with a good general idea regardless of which hand you shoot with.
Other Information
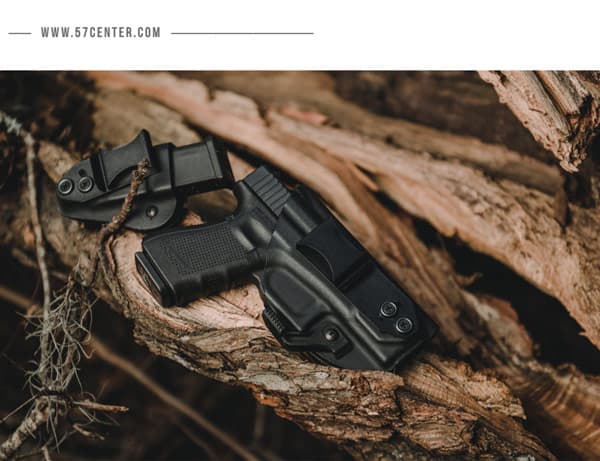
Now, it doesn’t really matter what kind of holster you might have. Whether its a Kydex holster, a leather holster, or even a paddle holster. All of these types of holsters have pre-existing retention that can be exchanged for the claw attachment. Need a claw holster that fits Glock? There’s plenty! Even something like an IWB Kydex holster can have this installed; any specific holster is capable of having a claw on it.
There’s a lot of other things you need to consider as well when it comes to concealed carry. Having a claw kit doesn’t mean that your pistol will magically disappear, especially if you’ve got a ton of accessories. If you’re one who maybe has a tactical light attached to your pistol or carries something like a mag pouch, you might want to consider how those will affect your claw and your maximum concealability.
It’s also a good idea to make sure that you have the best holster for your shooting preferences and pistol. A great concealed carry starts with the best holster (which is entirely subjective). A few good brands are Alien Gear and Sig Sauer if you don’t know where to start looking for products.
If the claw kit just isn’t for you, there’s still plenty of other options out there for concealment. A belt loop or paddle holster are also popular concealed carry styles that you can look into; both of these can still have a claw kit installed as well!
References
https://wethepeopleholsters.com/pages/claw-installation
https://www.vedderholsters.com/clawinstall
https://www.daraholsters.com/blog/what-is-a-holster-claw/
https://harrysholsters.com/what-is-a-holster-claw/

Brian Belko is a freelance writer and blogger. His primary areas of focus include the outdoors and shooting sports. In addition to his freelance work, Brian also writes for Wide Open Spaces and is on the Pro Staff at Military Hunting and Fishing. When he isn’t busy writing, Brian enjoys fishing farm ponds for bass and hitting the spring woods during turkey season.
